Approvals and Workflows
What are Approvals and how do they work?
Say you have multiple editors managing content, often you’ll need to review their work for quality assurance before it’s published to the live site. Approvals allow you to customize this process to increase your collaboration with your team while maintaining the quality of your content.
What does it look like?
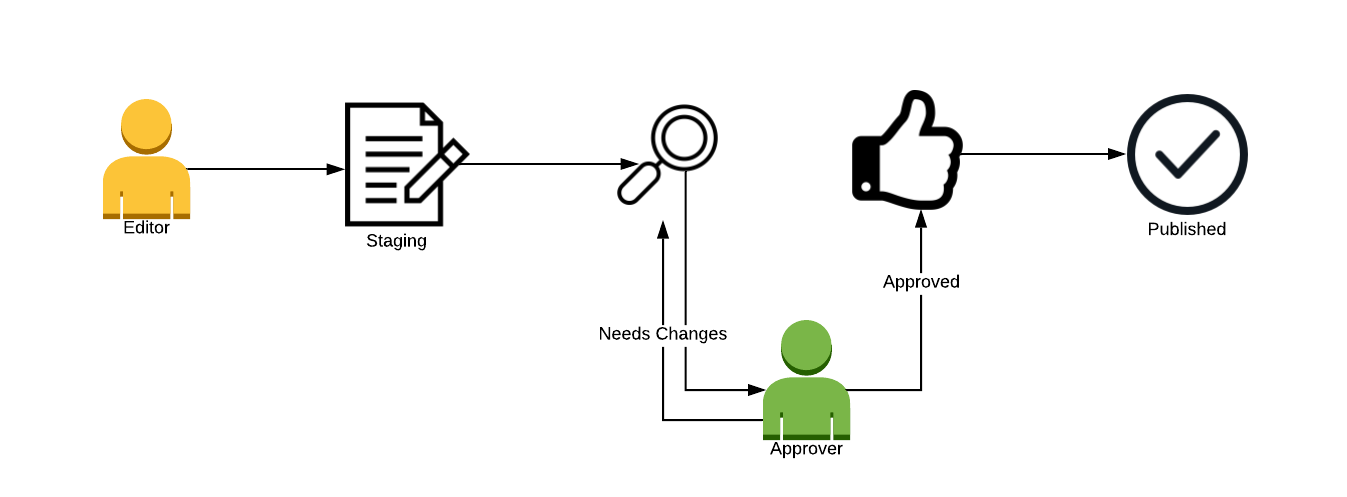
An example Approval workflow would look a little something like this:
- An Editor has set up a new landing page for a website campaign and feel confident the page is ready to go live, so they submit it for Approval
- The Approver, or Quality Checker, would then be notified to review the content in Agility and decide whether the content was ready to be published
- If changes are needed, it can be sent back to the Editor with notes so they can make the necessary changes and request Approval again or, if the Approver is satisfied, they could Approve it.
- Once approved, the Editor can then Publish the changes to your live environment.
Setting up and enabling Approvals
The first step is deciding what content types will require approvals and enabling them
Enabling Approvals for Layouts
1. From the Layouts Section in Agility, Select the Layout you’d like to enable Approvals for
2. Click the Properties tab in the right-hand sidebar
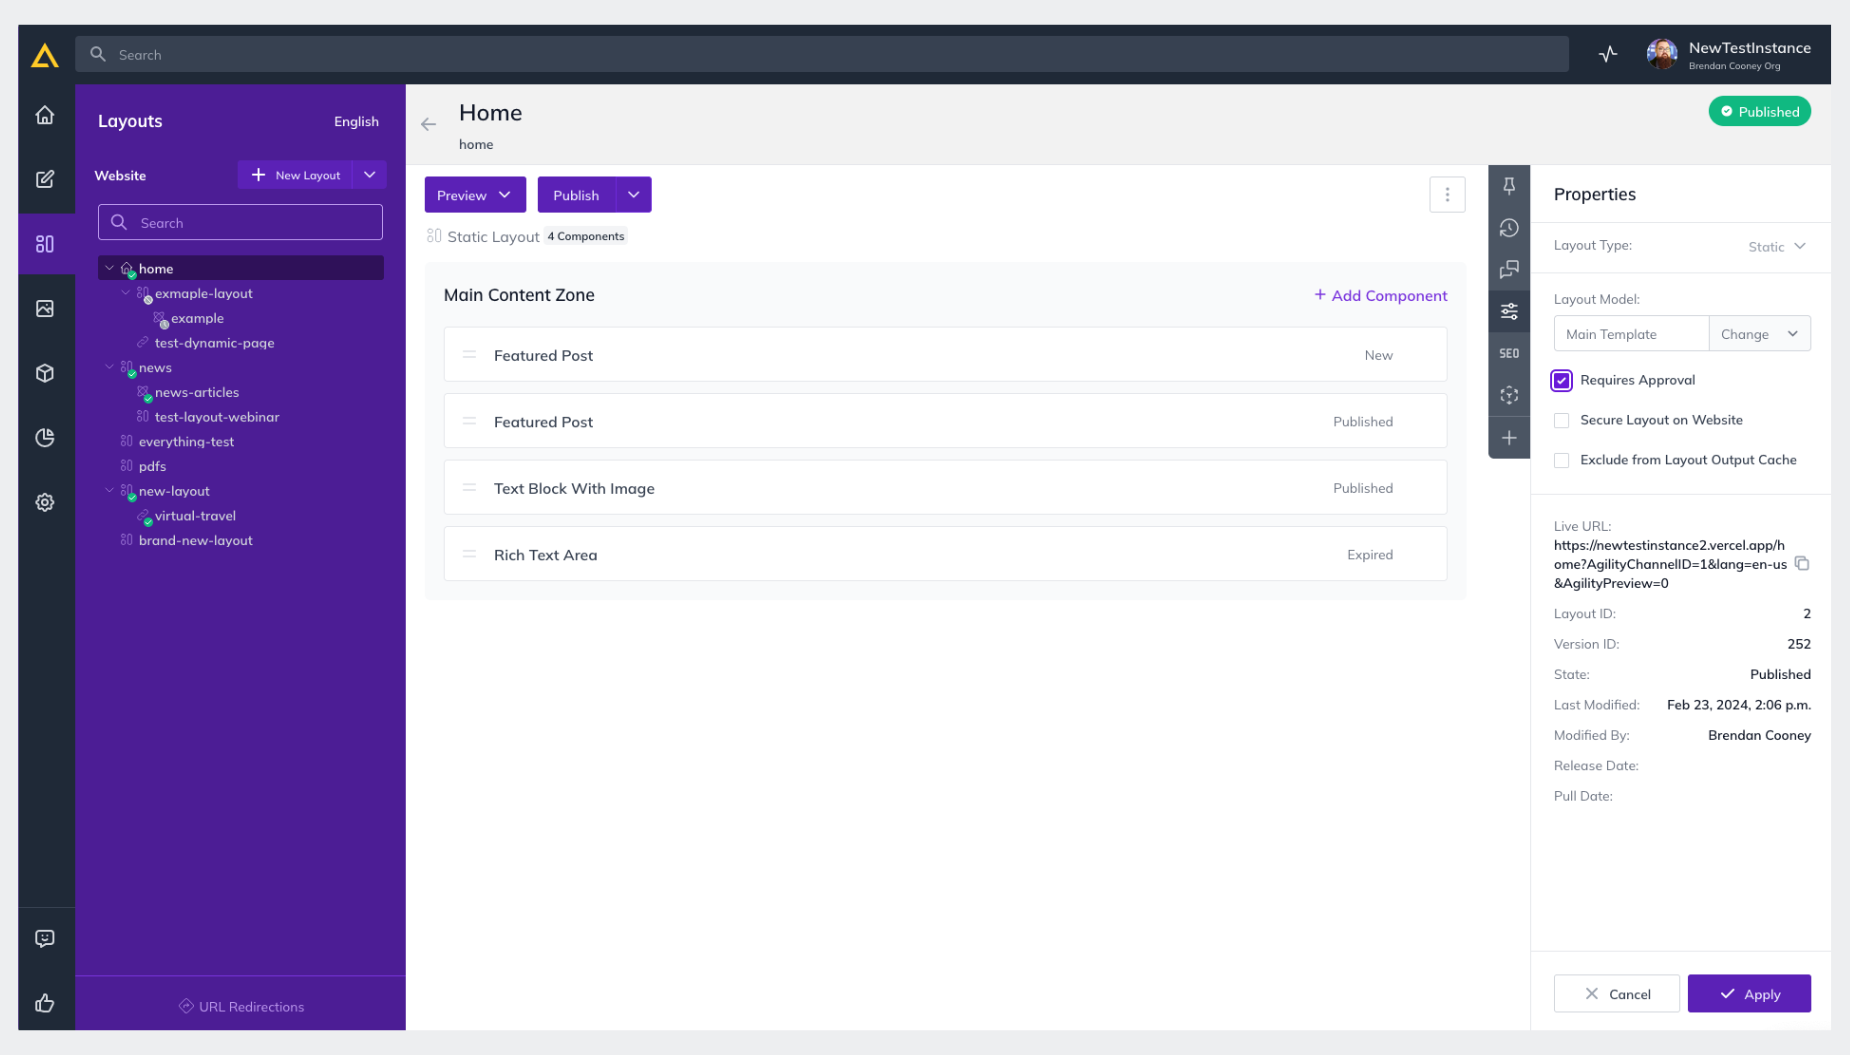
3. Check Requires Approval
4. Click Apply
Enabling Approvals for Content
1. From the Content Section in Agility, Select the Content Container you’d like to enable the Approvals Workflow for
2. Click the Developer Settings tab on the right-hand side
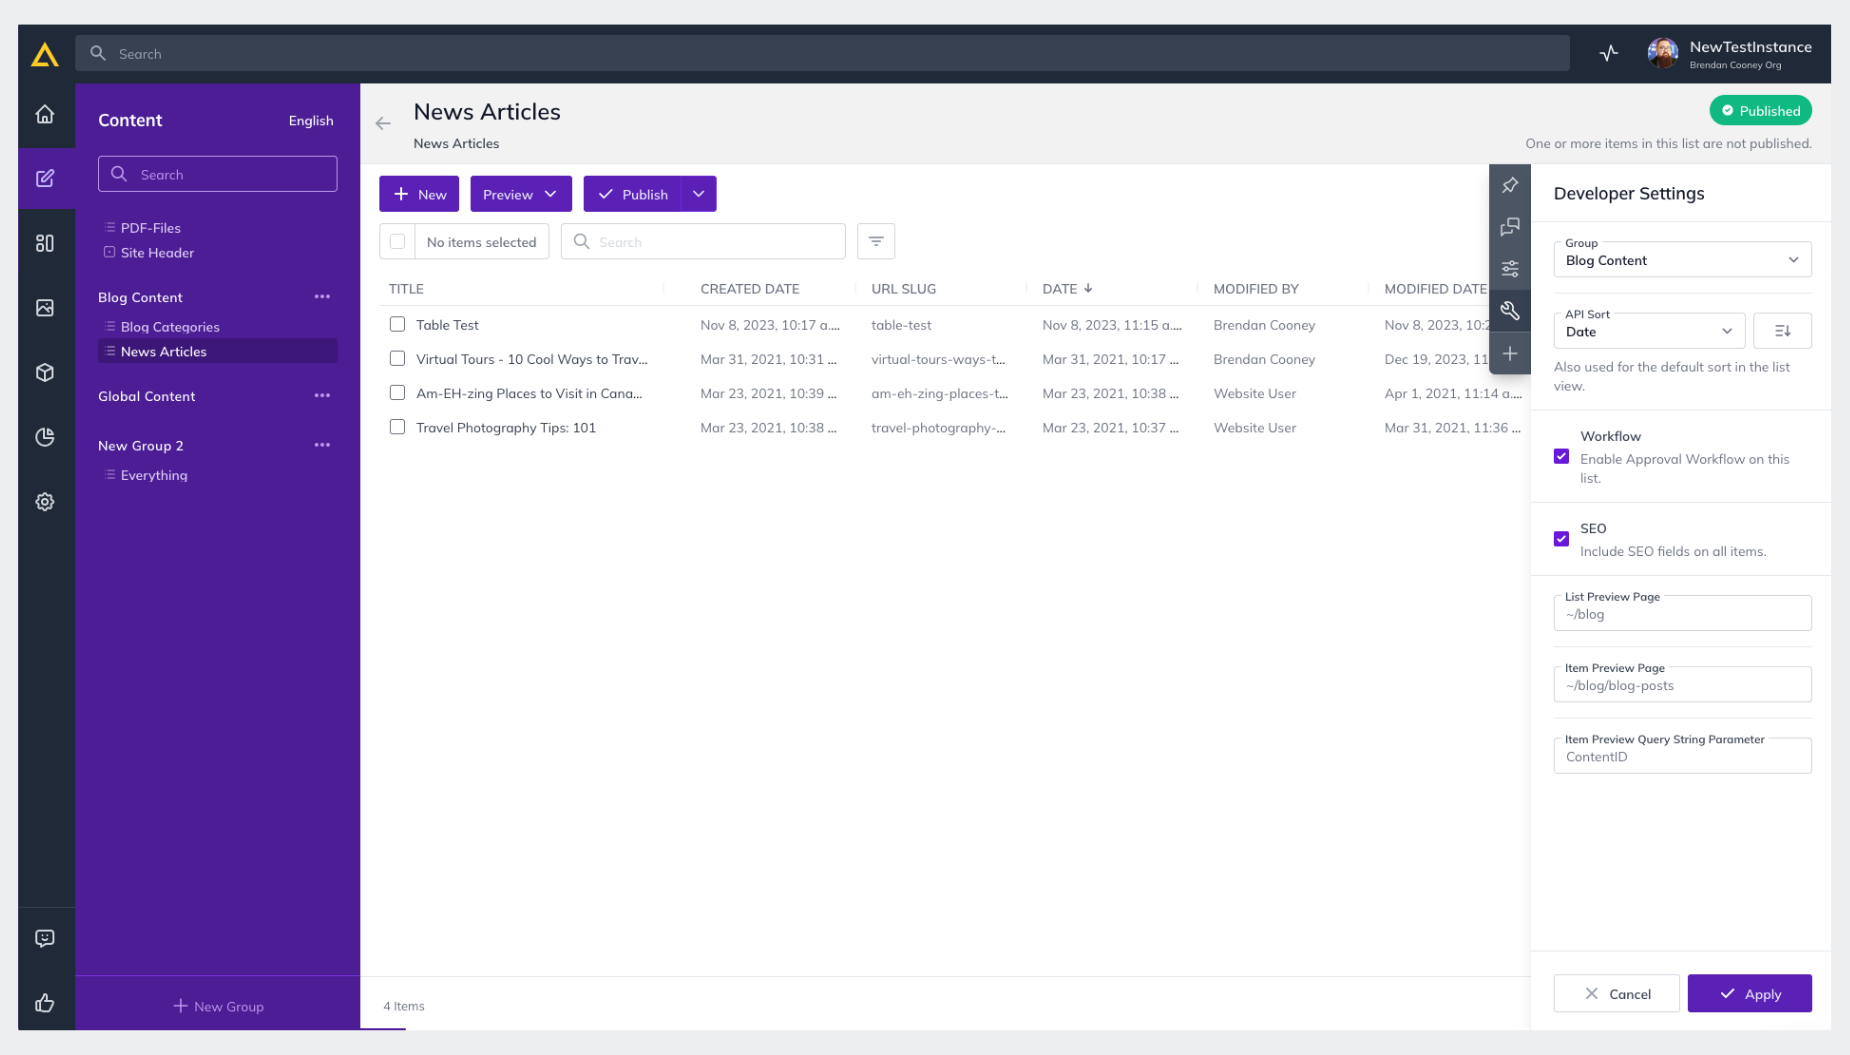
3. Check Enable Approval Workflow on this list
4. Click Apply
Assigning Approval Roles
Role Types
- Editor - Can only make changes to content and cannot publish content without Approval
- Publisher – Able to Edit content and layouts as well as Approve publish requests. Will receive a Task Alert that a change has been made and an Approval has been requested.
- Manager – Can Create and Delete content and layouts, while a Publisher could only edit them, and an Editor can only make changes.
How to set them up
1. Click Settings in your Agility Instance
2. Click User Access
3. Click the Edit (pencil) icon next to the user's name
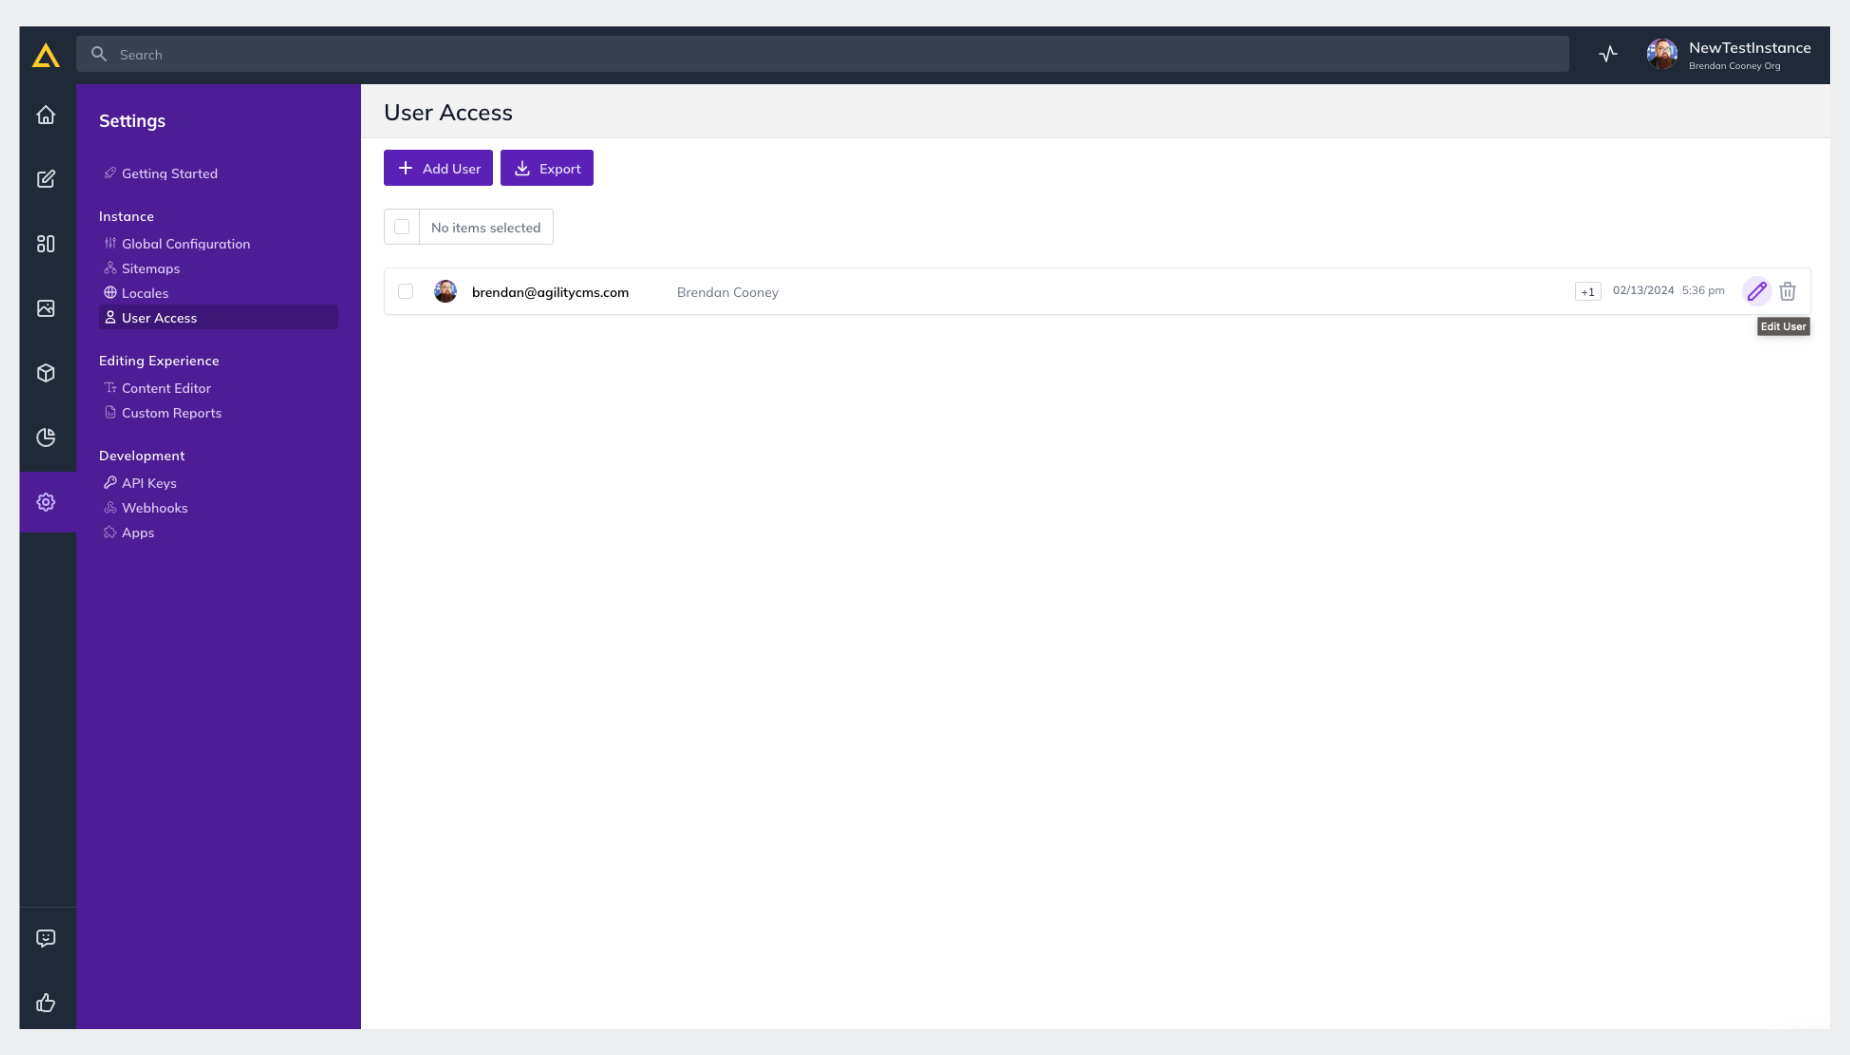
4. Click the Drop-down to select their role
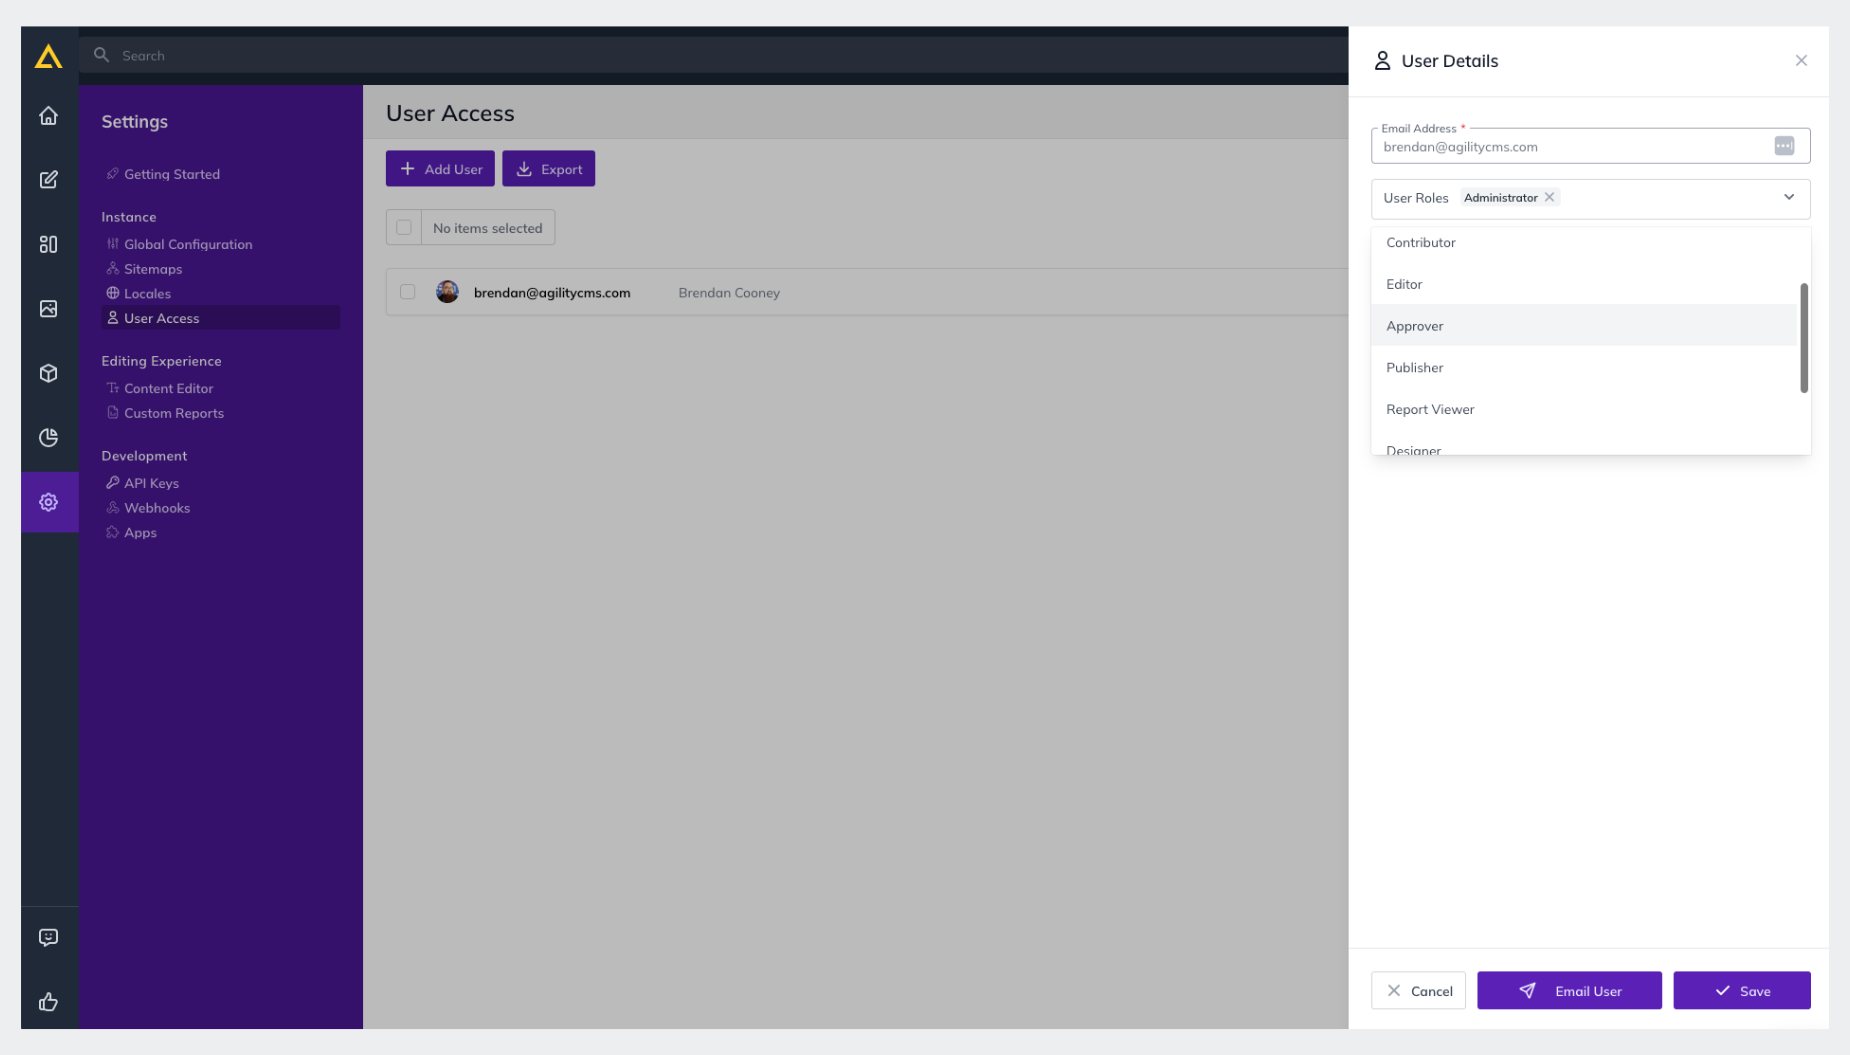
5. Click Save
- You can also click Email User to notify them of the change
Further Reading