Using the Next.js Starter
Our Next.js Starter was built for developers who want to quickly start using Agility with Next.js and save time and effort by using a starter already integrated with Agility.
What are the benefits of the Next.js Starter?
- It’s a simple bare-bones template that comes with a few built in examples for you to play and get started with
- Your site will be exported as Static HTML meaning lightning-fast rendering and no more waiting for your server to piece together and render your HTML
- Using the next/image component means your site will only load appropriately sized images for the device the user is using
- You can deploy your site to Vercel to take advantage of faster builds and previews
Features
- Uses our
@agility/nextpackage to make getting started with Agility and Next.js easy
- Connects to a sample Agility Instance for sample content & pages
- Uses the
getStaticPropsfunction from Next.js to allow for full SSG (Static Site Generation) - Uses
revalidatetag with Vercel to enable ISR (Incremental Static Regeneration) builds - Supports
next/imagefor image optimization - Supports full Page Management
- Supports Preview Mode
- Supports TypeScript
- Tailwind CSS for styling
- Supplies a functional structure that dynamically routes each page based on the request, loads a Page Templates dynamically, and also dynamically loads and renders appropriate Agility Page Modules (as React components)
Deploying your site
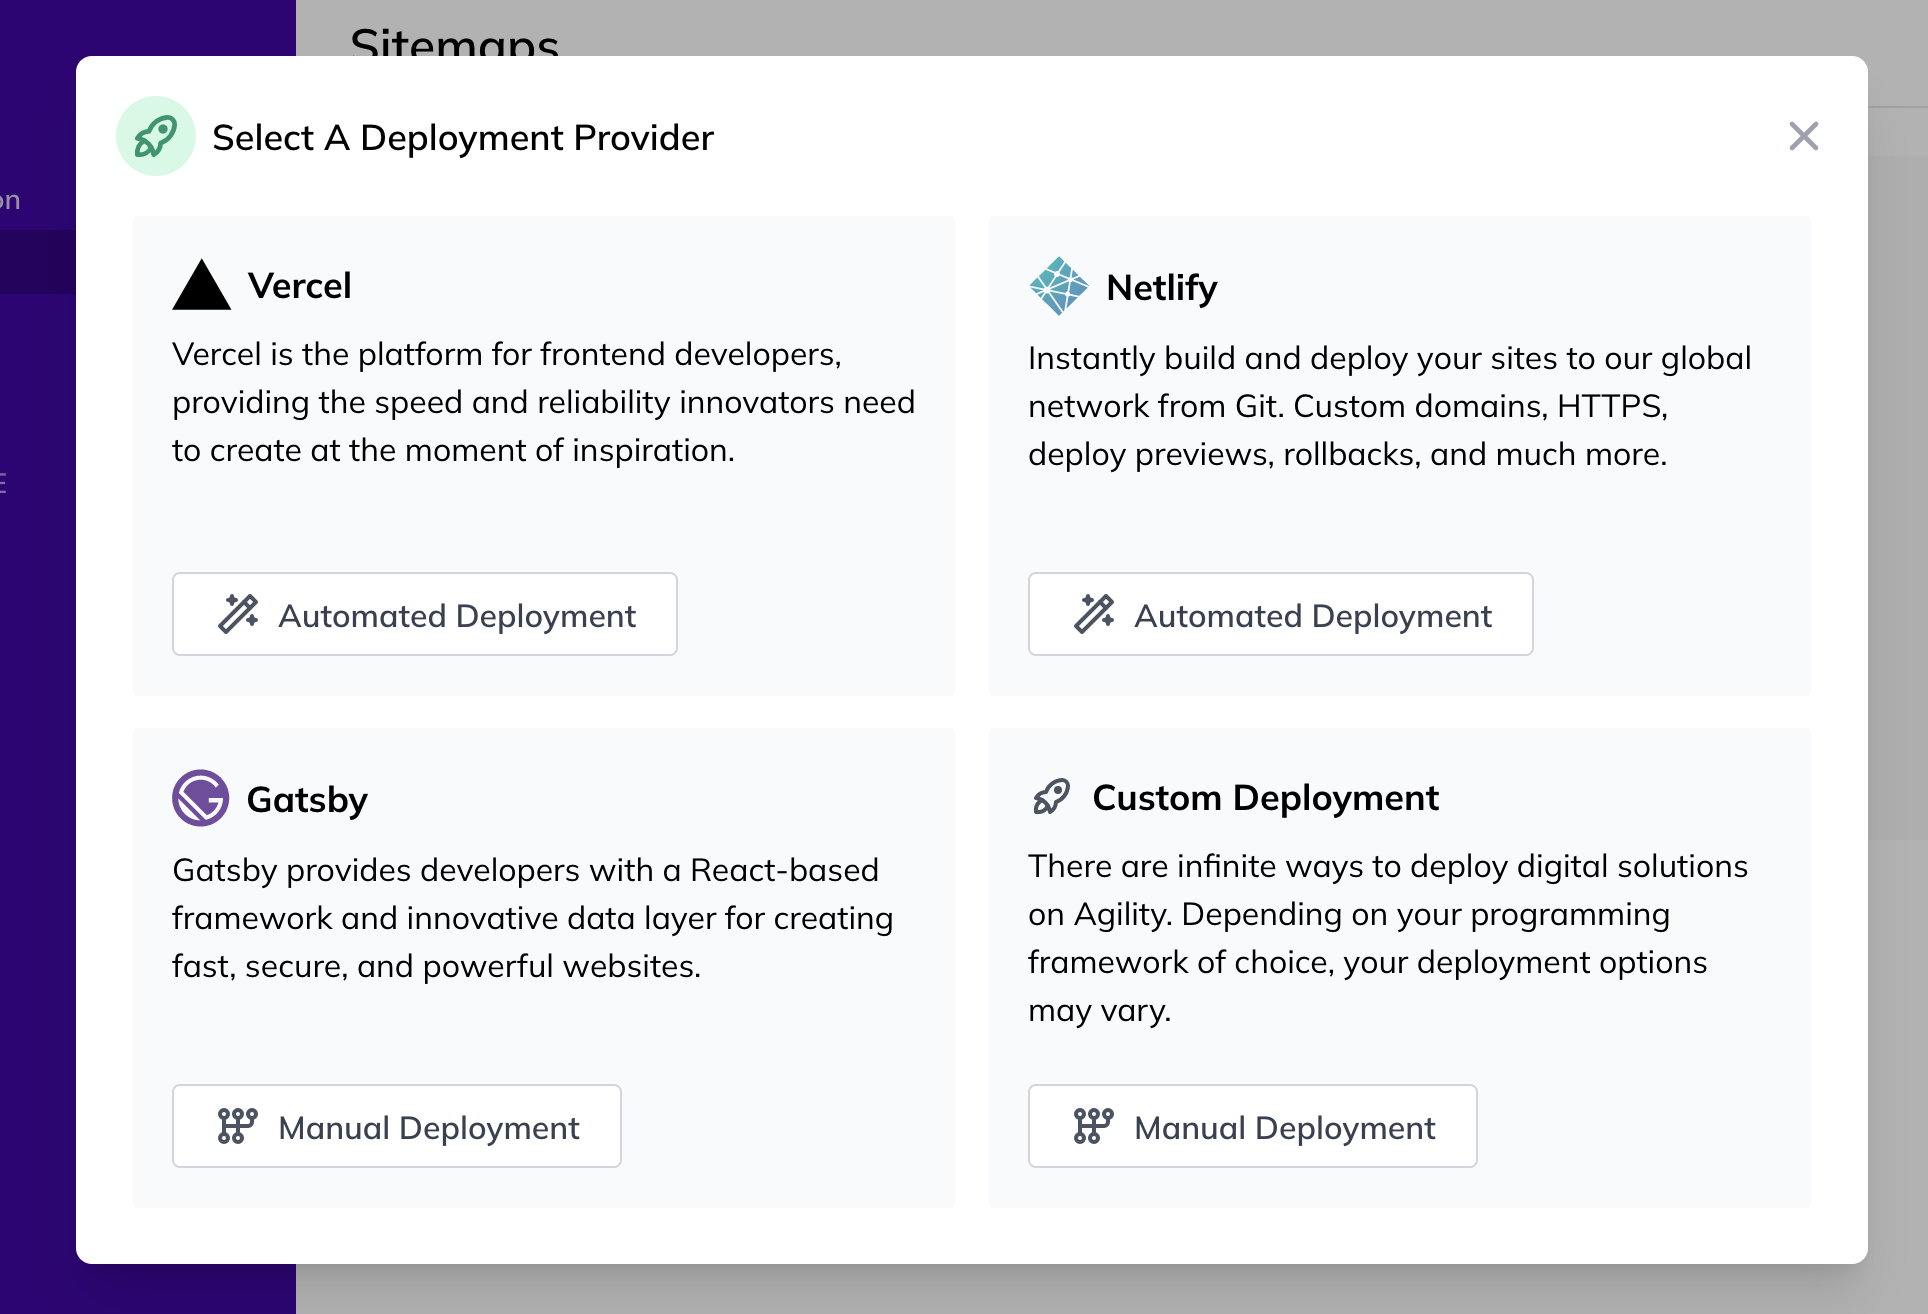
The easiest way to set up a deployment with Next.js is to use Vercel, the creators of the Next.js framework. Vercel is an all-in-one platform with Global CDN supporting static & Jamstack deployment and Serverless Functions.
To start with Vercel
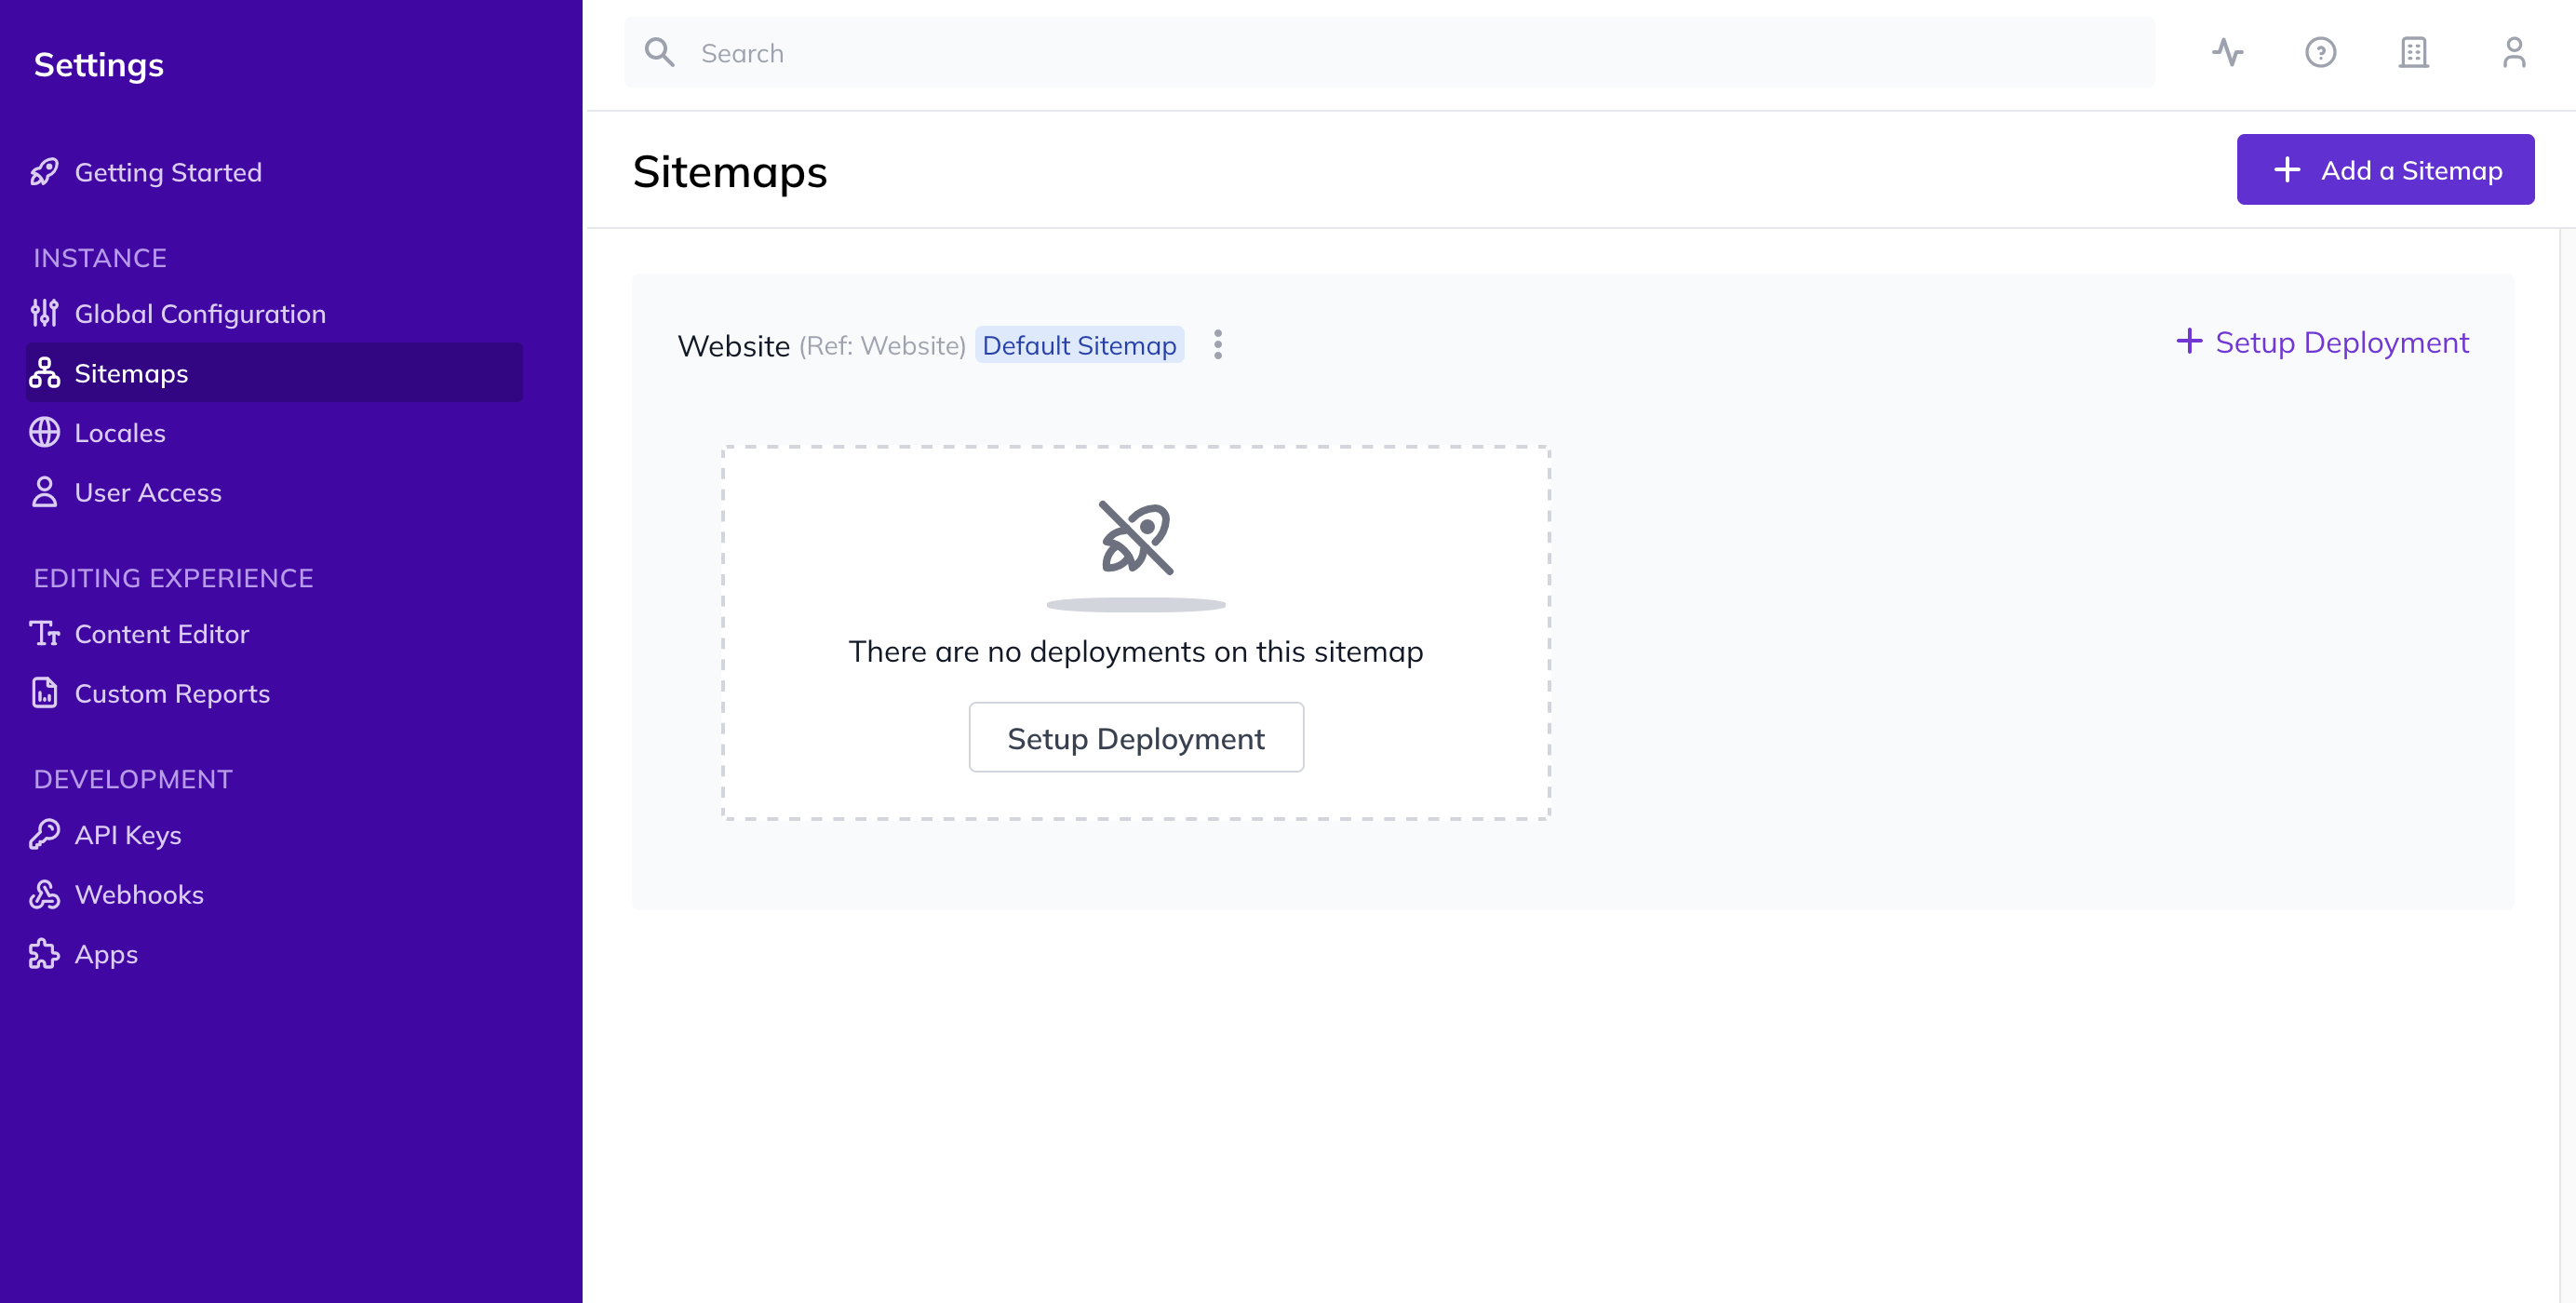
1. Open your Agility Instance and head to Settings > Sitemaps and then click Setup Deployment
2. Under Vercel, click Automated Deployment
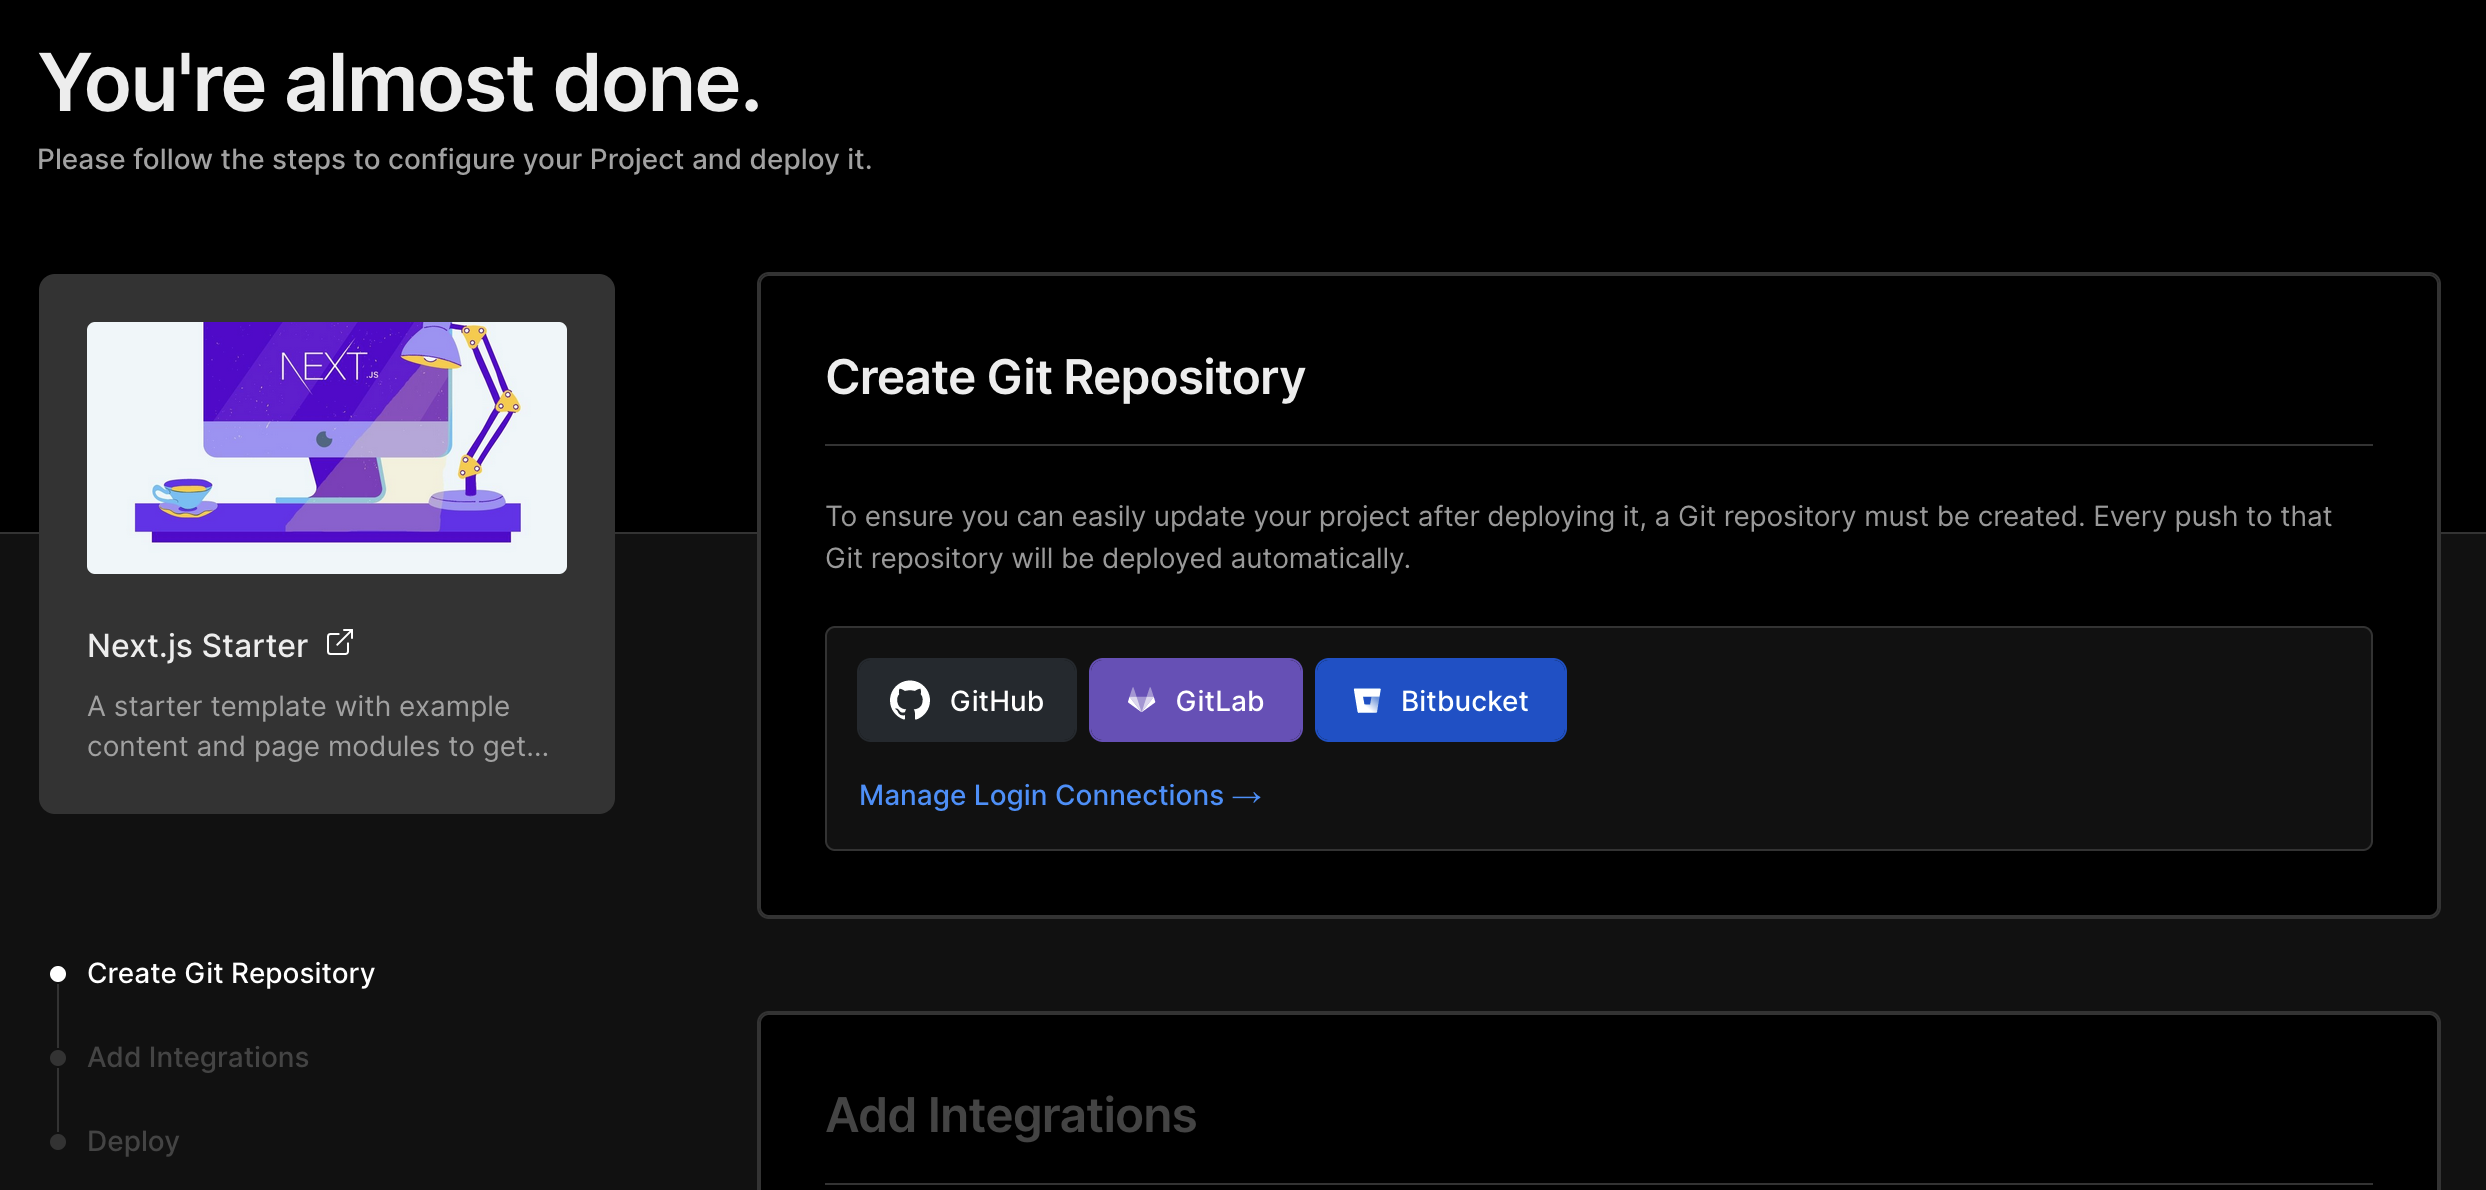
3. In the new window, create a Git Repository for your project to ensure you can easily update your project after deploying it.
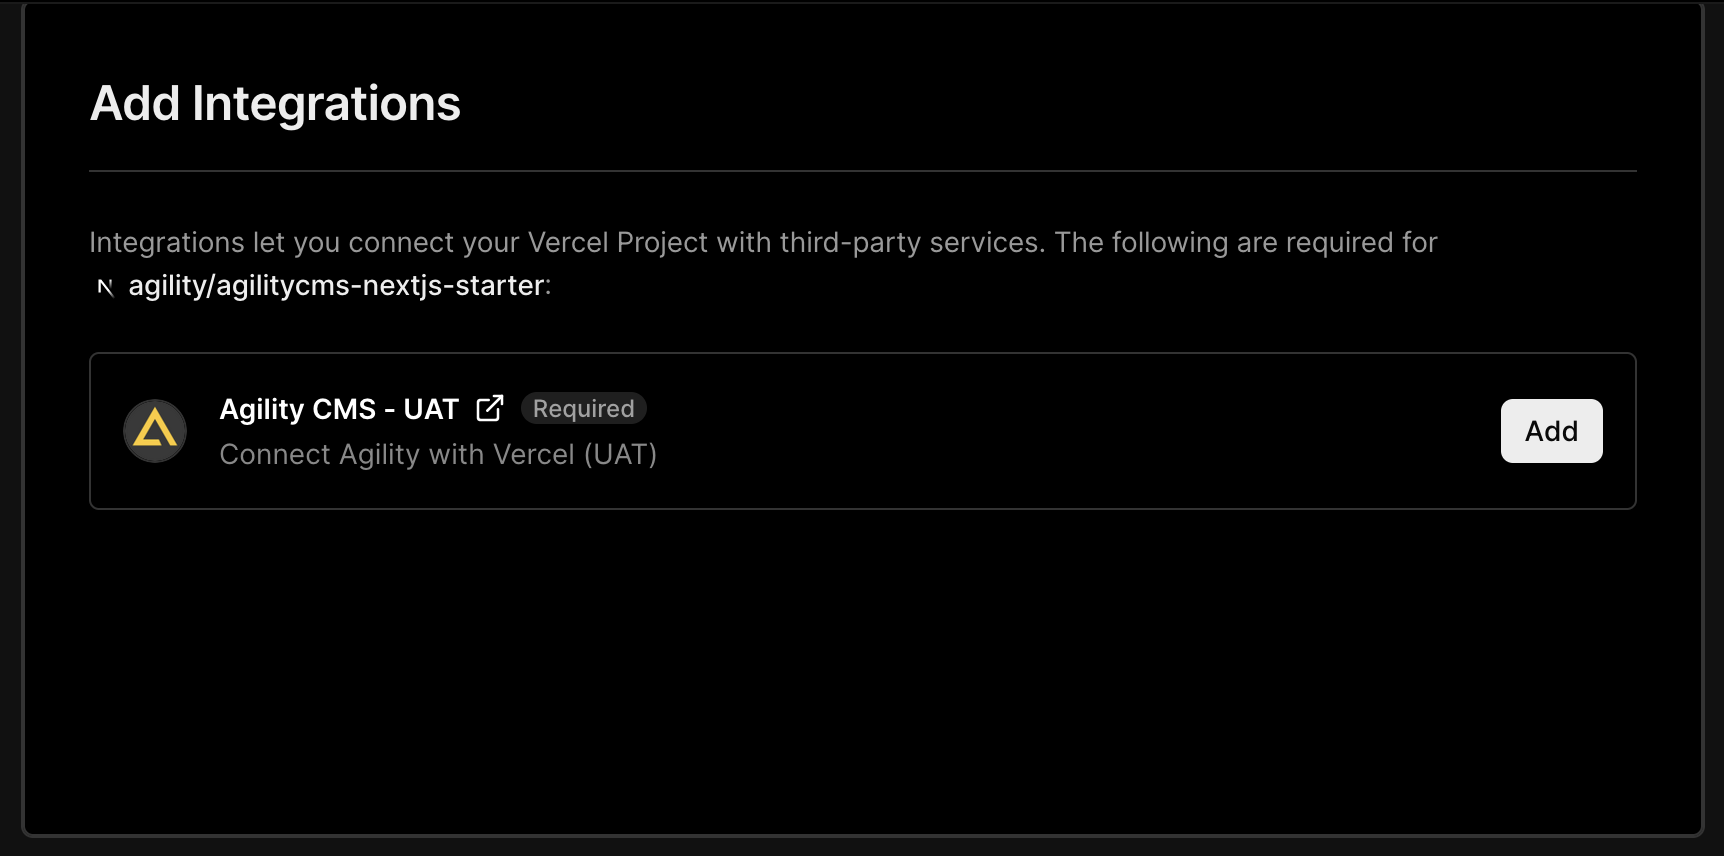
4. Next, Install the Agility Integration that will authorize access between Vercel and your Agility content so that we can automatically configure your Production and Preview domains, as well as set up your Environment Variables.
5. Vercel will then fetch the source code for the agilitycms-nextjs-starter and it will be cloned into your Git repository. Vercel will also build your project and upload/deploy your build output.

Once deployed you will be taken back to your Agility Instance where you’ll see that your Production and Preview domains have been set. You can click on the link to view your live site!
Set Up Your Local Environment
While logged into Agility, you'll want to grab your API credentials so your Next.js site can authenticate and retrieve data from your instance.
1. Click Settings, and then API Keys
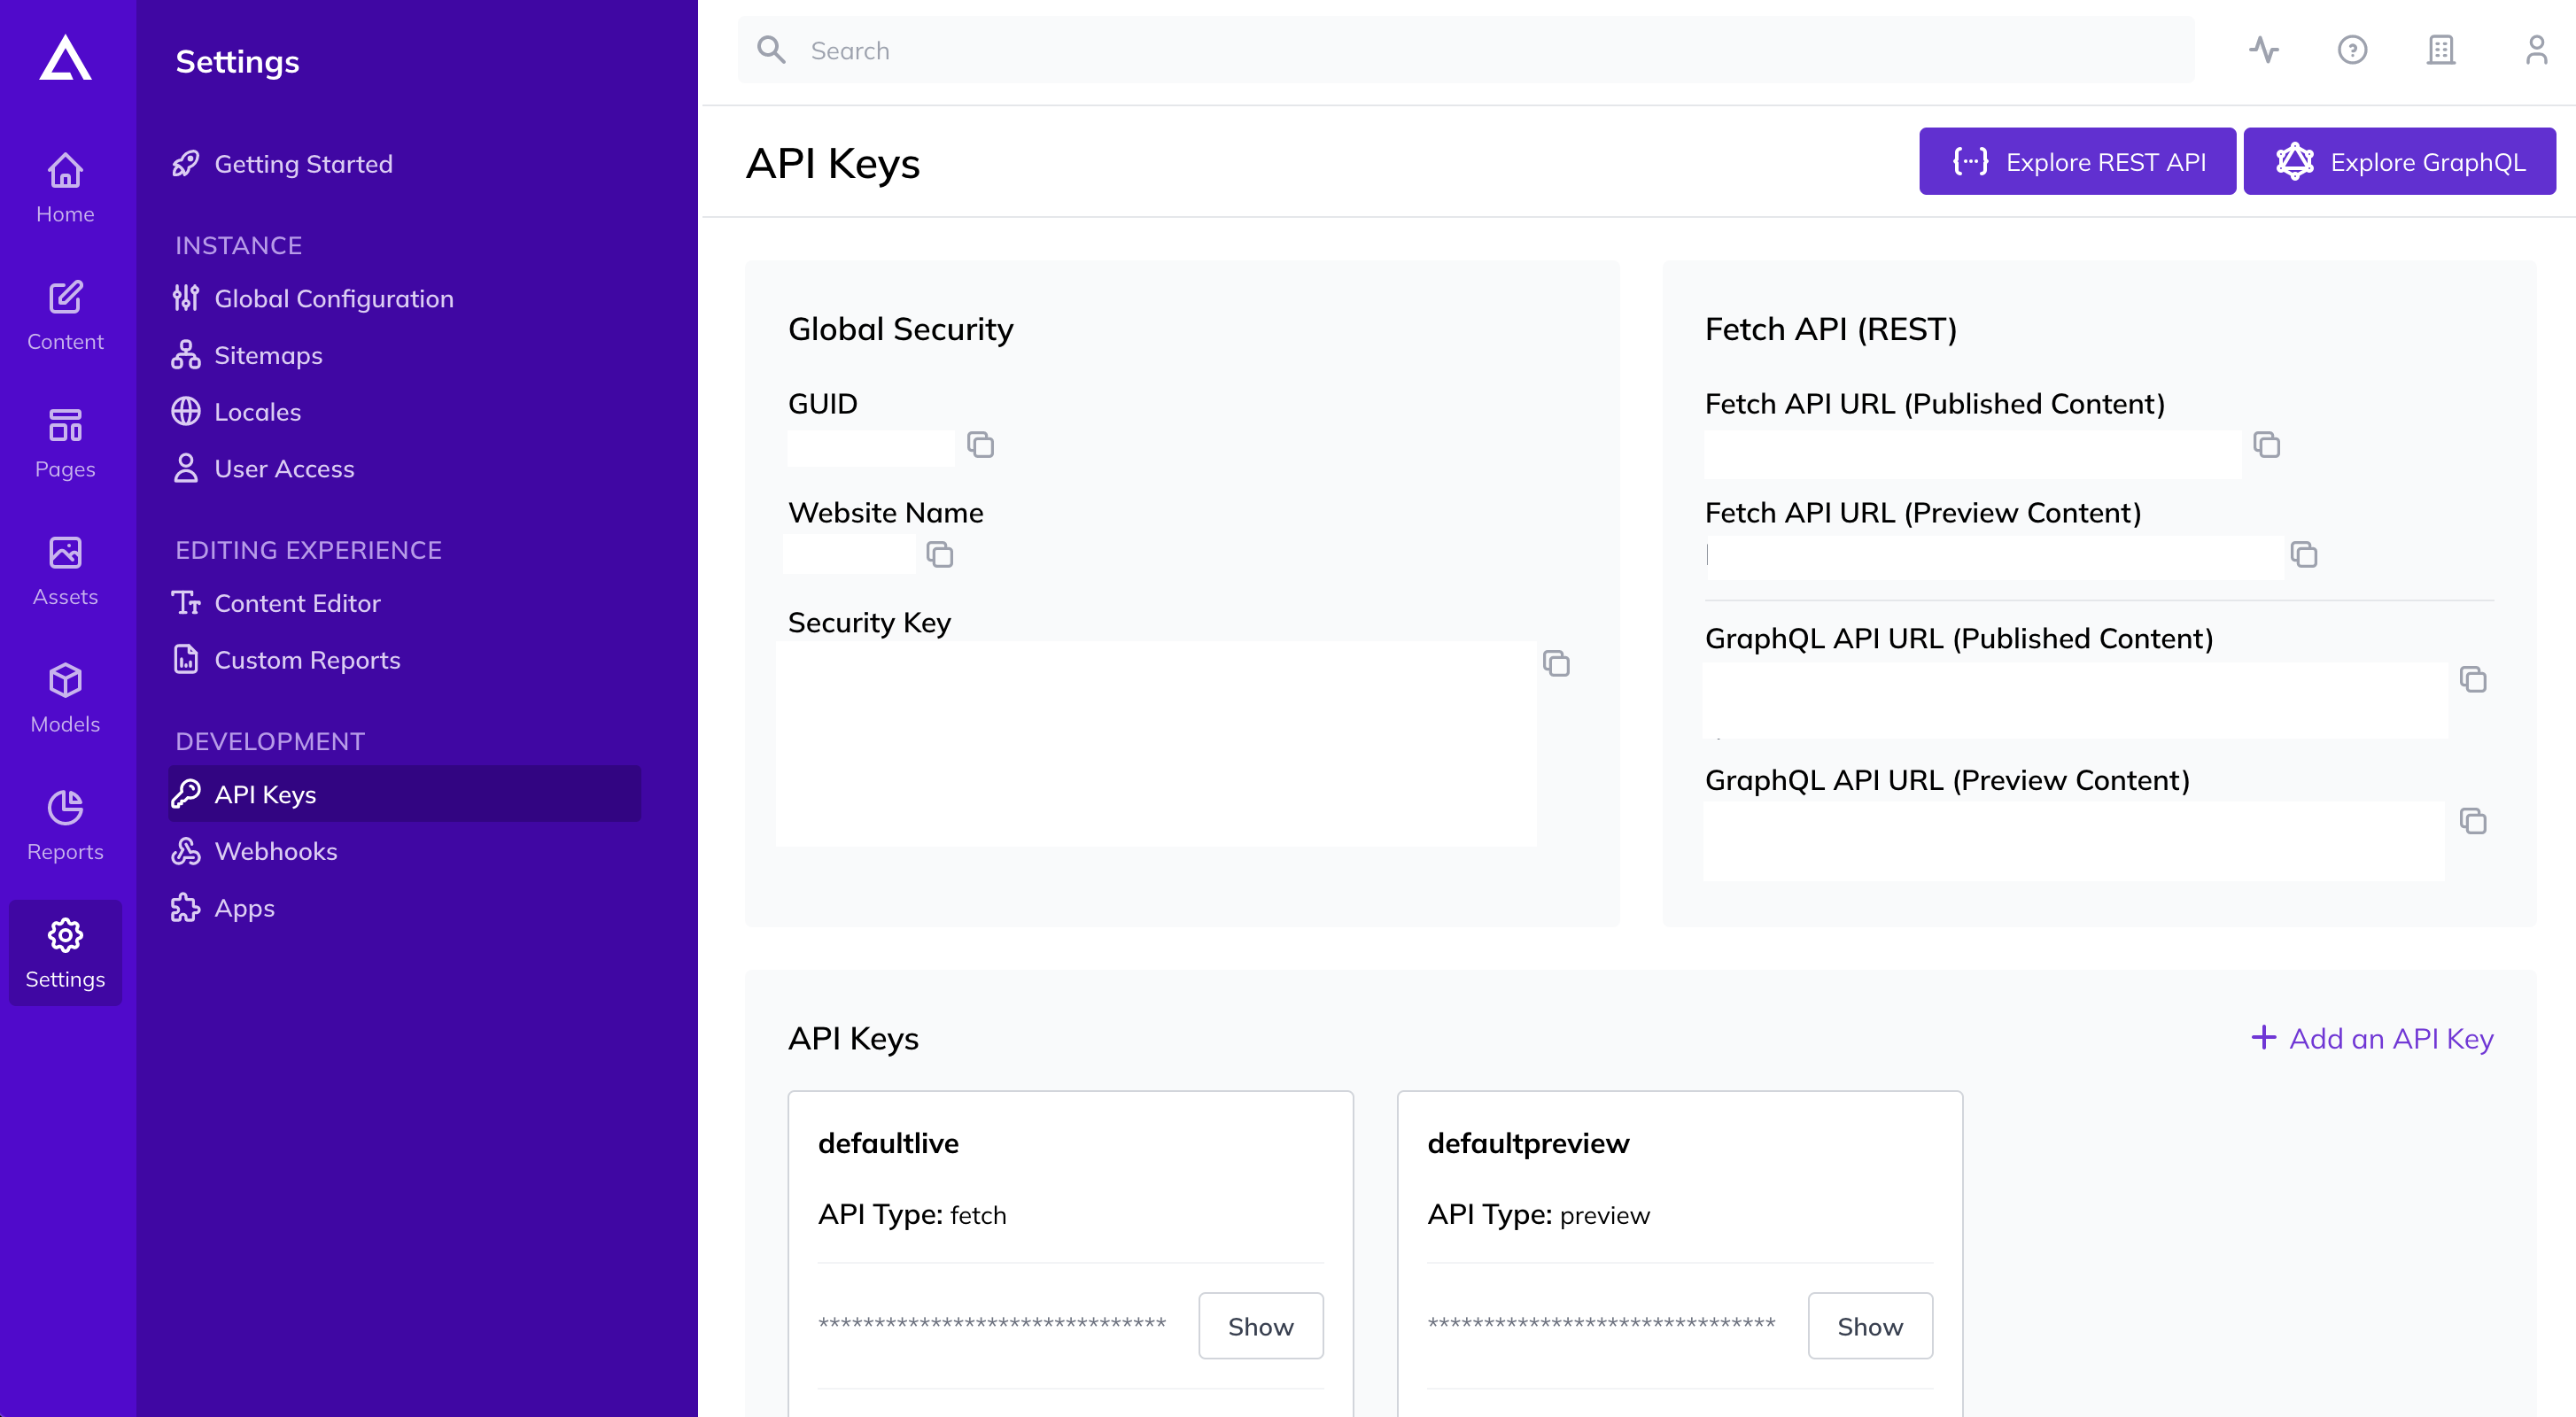
2. Note of your GUID, Live API Key, Preview API Key and Security Key credentials and copy these somewhere temporarily as you'll need to use them later
3. In GitHub, clone the repository that was created and open it in your favourite Text Editor
4. Run yarn install to install the required packages and dependencies
- If you are setting up the site without Deploy to Vercel, clone this repository.
5. To setup Authentication, rename the .env.local.example file to .env.local
6. Place the GUID, Live API Key, Preview API Key and Security Key Values into your .env.local file
Start the Site
To run the site locally, run npm run dev or yarn dev to start up your development server. If successful, Next.js will compile your pages in real-time and you will be able to access the site in your browser on [https://localhost:3000]
Setting Up Previews
After running next build, be sure to do a next startand copy the Preview URL from anywhere in Agility. Next replace the domain in that URL with http://localhost:3000/ which will allow you to test preview mode from a Production Environment.

Did you get a build error?
If you get an error during the build, check your log and ensure that you've entered the correct GUID and API Keys, as well as renamed the env.local.example file to .env.local.
Further Reading