How the Next.js Starter Works
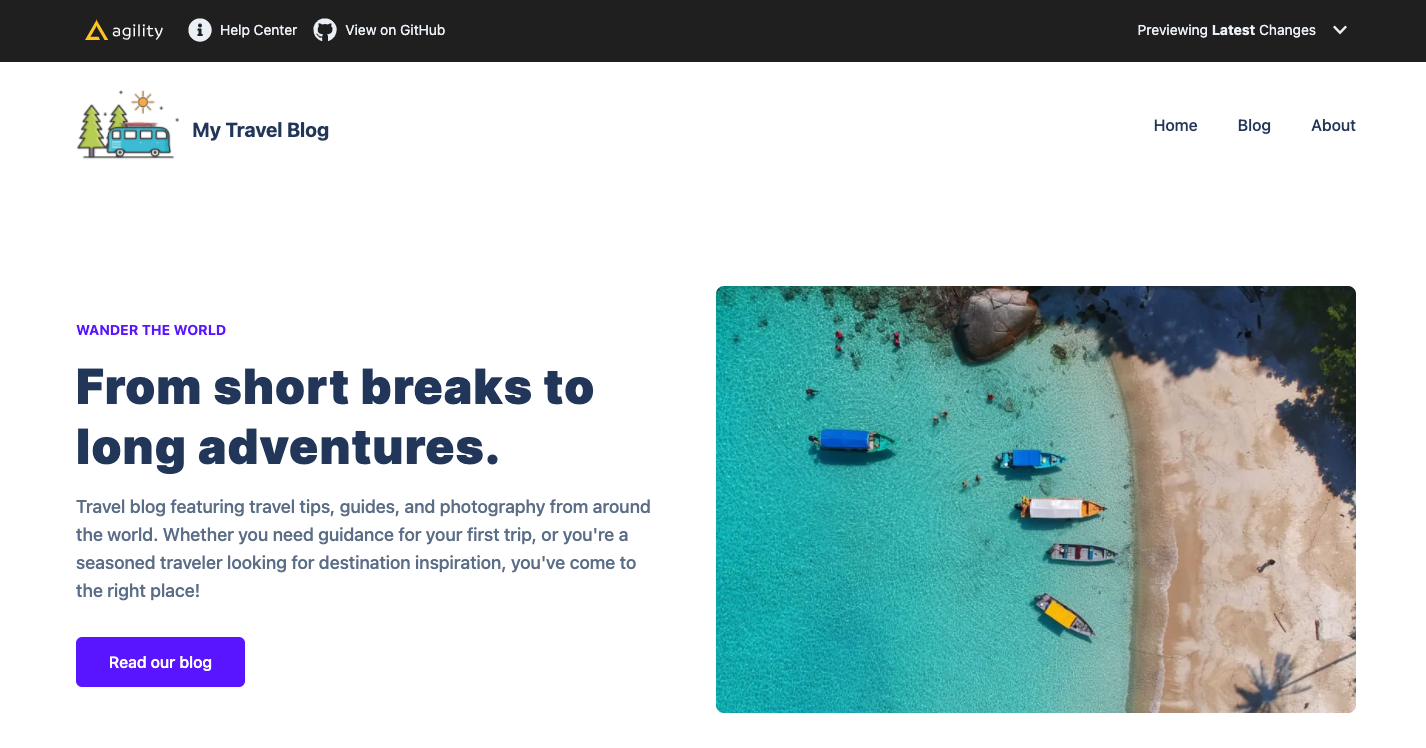
The Next.js Blog Starter showcases features such as our native Layout Management and shows how you should structure your Next.js website. This starter serves an example based on our recommended best-practices.
Note
This article uses code and API examples for many of the topics we discuss which have yet to be updated with our newest terminology.
Routing and Pages
When using Agility CMS, we believe Editors should have full control over the layouts on their website and should not need to rely on a developer. The agilitycms-next-starter makes it easy to source content and also generates the pages of your website based on your sitemap in Agility CMS.
Editors in the CMS can control what layouts are available, what the URLs are, what layout models they're using, and exactly what UI Components (Modules) make up each and every layout.
Layout Generation
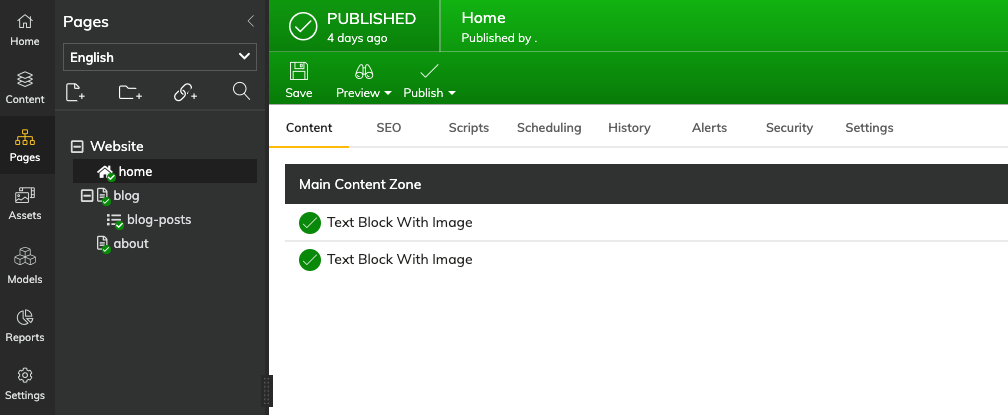
The above figure represents a sitemap of Layouts as well as the Components that are on each - all are managed in the CMS.
This means that when a build occurs in your Next.js site, the following layouts will be auto-generated for you:
/

/blog

/blog-posts/* - your dynamic page route for all of your blog posts (i.e. /blog/my-first-post)

/about
Layout Rendering
When a layout is being generated during build time, the final step is rendering the layout to HTML. In the agilitycms-nextjs-starter site, the [...slug].js file located within the pages (layouts) directory takes care of this for you. It returns a Layout.js component that passes all necessary props to render each page.
Source code for /pages/[...slug].js:
import Layout from "components/common/Layout";
import { getAgilityPageProps, getAgilityPaths } from "@agility/nextjs/node";
import { getModule } from "components/agility-pageModules";
import SiteHeader from "components/common/SiteHeader";

// getStaticProps function fetches data for all of your Agility Pages and Next.js will pre-render these pages at build time
export async function getStaticProps({
  preview,
  params,
  locale,
  defaultLocale,
  locales,
}) {
  // place all global here
  const globalComponents = {
    header: SiteHeader,
  };

  const agilityProps = await getAgilityPageProps({
    preview,
    params,
    locale,
    getModule,
    defaultLocale,
    globalComponents,
  });

  if (!agilityProps) {
    // We throw to make sure this fails at build time as this is never expected to happen
    throw new Error(`Page not found`);
  }

  return {
    // return all props
    props: agilityProps,

    // Next.js will attempt to re-generate the page when a request comes in, at most once every 10 seconds
    // Read more on Incremental Static Regenertion here: https://nextjs.org/docs/basic-features/data-fetching#incremental-static-regeneration
    revalidate: 10,
  };
}

// Next.js will statically pre-render all the paths from Agility CMS
export async function getStaticPaths({ locales, defaultLocale }) {
  //get the paths configured in agility
  let agilityPaths = await getAgilityPaths({
    preview: false,
    locales,
    defaultLocale,
  });

  return {
    paths: agilityPaths,
    fallback: true,
  };
}

const AgilityPage = (props) => {
  return <Layout {...props} />;
};

export default AgilityPage;
Layout Rendering Process
getStaticProps is a function in Next.js that will pre-render a layout at build time using the props that it returns. getAgilityPageProps will get all the context for a particular layout and return it as your props.
export async function getStaticProps({
  preview,
  params,
  locale,
  defaultLocale,
  locales,
}) {

  const globalComponents = {
    header: SiteHeader,
  };

  const agilityProps = await getAgilityPageProps({
    preview,
    params,
    locale,
    getModule,
    defaultLocale,
    globalComponents,
  });

  if (!agilityProps) {
    throw new Error(`Page not found`);
  }

  return {
    props: agilityProps,
    revalidate: 10,
  };
}
Instant Builds?
Take note of the revalidate tag. When your Next.js and Agility CMS site is hosted on Vercel, the revalidate tag turns your deployment into an instant build machine - meaning your pages are built as they change!
Content Items stored in Agility that you want to appear or have access to globally across your site such as a Site Header or Site Footer Component should be imported and placed within the globalComponents object.
 const globalComponents = {
   header: SiteHeader,
 };
The props are then passed into the AgilityPage Component which returns a Layout Component that will handle your Layout Models.
const AgilityPage = (props) => {
    return <Layout {...props} />;
};
The Layout.js Component resolves which Layout Model should be rendered (<AgilityPageTemplate />) and passes the necessary content as props. The Layout.js component will also handle your site SEO and Preview.
// set up handle preview
const isPreview = handlePreview();

function Layout(props) {
  const {
    page,
    sitemapNode,
    dynamicPageItem,
    notFound,
    pageTemplateName,
  } = props;

  const router = useRouter();
  if (router.isFallback) {
    return ;
  }

  if (notFound === true) {
    return ;
  }

  const AgilityPageTemplate = getPageTemplate(pageTemplateName);

  if (dynamicPageItem?.seo?.metaDescription) {
    page.seo.metaDescription = dynamicPageItem.seo.metaDescription;
  }

  return (
    <>
      <SEO
        title={sitemapNode?.title}
        description={page.seo.metaDescription}
        keywords={page.seo.metaKeywords}
        metaHTML={page.seo.metaHTML}
      />
      <div id="site-wrapper">
        {isPreview && <LoadingWidget message="Loading Preview Mode" />}
        {!isPreview && (
          <div id="site">
            <PreviewBar {...props} />
            <div className="flex flex-col min-h-screen">
              <SiteHeader {...props} />
              <main className="flex-grow">
                <AgilityPageTemplate {...props} />
              </main>
              <SiteFooter {...props} />
            </div>
          </div>
        )}
      </div>
    </>
  );
}

export default Layout;
Layout Models in Agility CMS use the <ContentZone /> Component from the @agility/nextjs package and the getModule function from the agility-pageModules directory to identify where Components for specific Zones should be rendered within the Layout Model. Here's an example for a "Main Layout Model":
import React from "react";
import { ContentZone } from "@agility/nextjs";
import { getModule } from "components/agility-pageModules";

const MainTemplate = (props) => {
  return (
    <ContentZone name="MainContentZone" {...props} getModule={getModule} />
  );
};

export default MainTemplate;
Within each <ContentZone />
Component Models
In Agility CMS, Component Models are functional components Editors use to compose what type of content is on each page and in what order they appear.
Developers define what page modules are available in the CMS and what fields they consist of. Each Component defined within Agility CMS should have a corresponding React Component in your Next.js site.
If components are not defined, or the editor do not add components to layouts, then there won't be anything to output on your layouts.
An Example
In our agilitycms-nextjs-starter site, the name of the component is used to find a corresponding react component that matches the same name. If there is a match, then that component will be dynamically imported and rendered for you.
For example, if a component has the name of RichTextArea in the CMS, while Next.js is rendering your layouts, it will look for RichTextArea.js inside of agility-pageModules directory.
The <ContentZone /> component on your Layout Model will dynamically import the module and pass all the field values for the component as props.
RichTextArea.js:
import React from "react";
import { renderHTML } from "@agility/nextjs";

const RichTextArea = ({ module }) => {
  // get module fields
  const { fields } = module;
  return (
    <div className="relative px-8">
      <div className="max-w-2xl mx-auto my-12 md:mt-18 lg:mt-20">
        <div
          className="prose max-w-full mx-auto"
          dangerouslySetInnerHTML={renderHTML(fields.textblob)}
        />
      </div>
    </div>
  );
};

export default RichTextArea;
How to Add a new Component Model
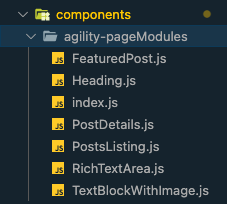
If you create a new Component Model within Agility CMS, you'll want to create the corresponding React component for it within the agility-pageModules directory.
All of the Component Models that are being used within the site need to be imported into the index file within the agility-pageModules directory and added allModules array:
import RichTextArea from "./RichTextArea";
import FeaturedPost from "./FeaturedPost";
import PostsListing from "./PostsListing";
import PostDetails from "./PostDetails";
import Heading from "./Heading";
import TextBlockWithImage from "./TextBlockWithImage";

const allModules = [
  { name: "TextBlockWithImage", module: TextBlockWithImage },
  { name: "Heading", module: Heading },
  { name: "FeaturedPost", module: FeaturedPost },
  { name: "PostsListing", module: PostsListing },
  { name: "PostDetails", module: PostDetails },
  { name: "RichTextArea", module: RichTextArea },
];

export const getModule = (moduleName) => {
  if (!moduleName) return null;
  const obj = allModules.find(
    (m) => m.name.toLowerCase() === moduleName.toLowerCase()
  );
  if (!obj) return null;
  return obj.module;
};
If there is no React component for your Component Model, then nothing can be rendered for it in your Next.js site.
How to Change the Fields
You can alter your fields at any time and the field values passed to your component will update automatically the next time you run another build.
Layout Models
Layout Models in Agility CMS allow developers to differentiate the styles of certain types of layouts, and also define where on the layout editors can add and edit Component Models (functional components of the layout that editors can control).
Depending on your scenario, some sites may only use a single layout model and re-use it across the site, while other sites may have multiple layout models to allow for more flexible layouts.
What's in a Layout Model?
When editors create layouts in Agility CMS, they must select which Layout model they'd like to use.
A Layout Model consists of a Name and Zones.
The Name should represent what the editor can expect from using the Layout Model. For example, a site may have Layout Models named One Column Template, Two Column Template, or Blog Template.
A Zone is an area defined in the Layout Model where an editor can add, edit, or remove components. A Layout Model can have one or many Zones.
An Example
In the agilitycms-nextjs-starter site, the Name of the Layout Model is used to find the corresponding React Component that matches the same name. If a match is found, that Component will be dynamically imported and rendered for you.
For example, if a Layout Model has the name of Main Template in the CMS, while the page is being rendered, it will look for MainTemplate.js inside of the agility-pageTemplates directory.
Taking a look at the Layout.js file from our agilitycms-nextjs-starter site, the <AgilityPageTemplate /> Component will automatically take care of resolving and rendering the appropriate Layout Model
Layout.js:
const AgilityPageTemplate = getPageTemplate(pageTemplateName);
mainTemplate.js:
import React from "react";
import { ContentZone } from "@agility/nextjs";
import { getModule } from "components/agility-pageModules";

const MainTemplate = (props) => {
  return (
    <ContentZone name="MainContentZone" {...props} getModule={getModule} />
  );
};

export default MainTemplate;
How to Add a New Layout Model
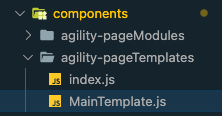
When you create a new Layout Model within Agility CMS, you'll want to create the corresponding React Component for it within the agility-pageTemplates directory.
All of the Layout Models that are being used within the site need to be imported into the index file within the agility-pageTemplates directory and added allTemplates array:
import MainTemplate from "./MainTemplate";

const allTemplates = [
 { name: "MainTemplate", template: MainTemplate }
];

export const getPageTemplate = (templateName) => {
  if (!templateName) return null;
  const obj = allTemplates.find(
    (m) => m.name.toLowerCase() === templateName.toLowerCase()
  );
  if (!obj) return null;
  return obj?.template;
};
If there is no corresponding React Component for your Layout Model, then nothing can be rendered for it in your Next.js site.
How to Add a Zone
You can alter your Zones at any time, simply import ContentZone@agility/nextjs<ContentZone /> within your Layout Model React Component. The <ContentZone /> Component will tell your Next.js site where to render the modules for this Zone within your code.
For example, this means that all Component Models in MainContentZone for a layout are to be rendered here.
<ContentZone name="MainContentZone" {...props} getModule={getModule} />
Optimizing Images
Where possible, we always recommend storing your images in Agility CMS's Assets area. These are automatically deployed to a CDN and support basic image transcoding via query-strings. You can simply continue to use the CDN URLs provided for your content without any additional work.
However, one of the primary benefits of having a static website is that nothing on your site can change without a new build. This ensures your website updates are atomic. If you are using CDN links to images though, in your site, one could alter an image and that change would take effect immediately on your site. You'd also have no way of reliably rolling back your site to a previous version since the images on the CDN are managed separately.
next/image
Next.js has a built-in Image Component and Automatic Image Optimization. You can take advantage of this Image Optimization via the <Image /> Component exported by next/image.
It's important to note that this component will optimize images using the web server's CPU, and any Agility images served through this component will not be automatically invalidated when they are changed in Agility.
For Agility images, we recommend using the <AgilityImage> component, described below.
Using AgilityImage
AgilityImage is a wrapper for the next/image Component that comes configured to change image URL parameters to resize, optimize format as well as adjust image quality on our CDN.
We recommend using this component for your Agility images in Next.js sites.
See here for all available props.
Example
import { AgilityImage } from "@agility/nextjs"

<AgilityImage
  src={fields.image.url}
  alt={fields.image.label}
  width="768"
  height="512"
  className="rounded-lg object-cover object-center"
/>
Previews
Being able to preview content prior to publishing is a feature every editor should have. With Vercel, previewing your Agility CMS changes on your Next.js site is extremely easy.
When your Agility CMS and Next.js site is configured for Previews, clicking the Preview button on your pages will open up a new tab with your Preview Environment.
A cookie is set to let Vercel know that you are opening this page in Preview Mode. You will notice a handy Preview Bar at the top of your page with a toggle that allows you to switch between Preview and Live Mode to make it easy for you to view your Published Content or Latest Changes.
Further Reading